
It can be tough to find the right tools and resources, especially as a beginner.
Traditional design software can be complex and expensive, making it difficult to get started.
You might be worried about wasting time and money on tools you don't understand. That's where Figma comes in!
It's a user-friendly, web-based design tool that's perfect for beginners. With Figma, you can learn to design fast & create amazing projects without breaking the bank.
In this guide, we'll show you how to use Figma in no time!
Getting Started with Figma
Okay, let's dive right in! Before you start designing anything amazing, you need to set up your Figma world.
Creating a Figma Account
First things first, head over to the Figma website and sign up for a free account.
It's super easy, just like creating an account on any other website.
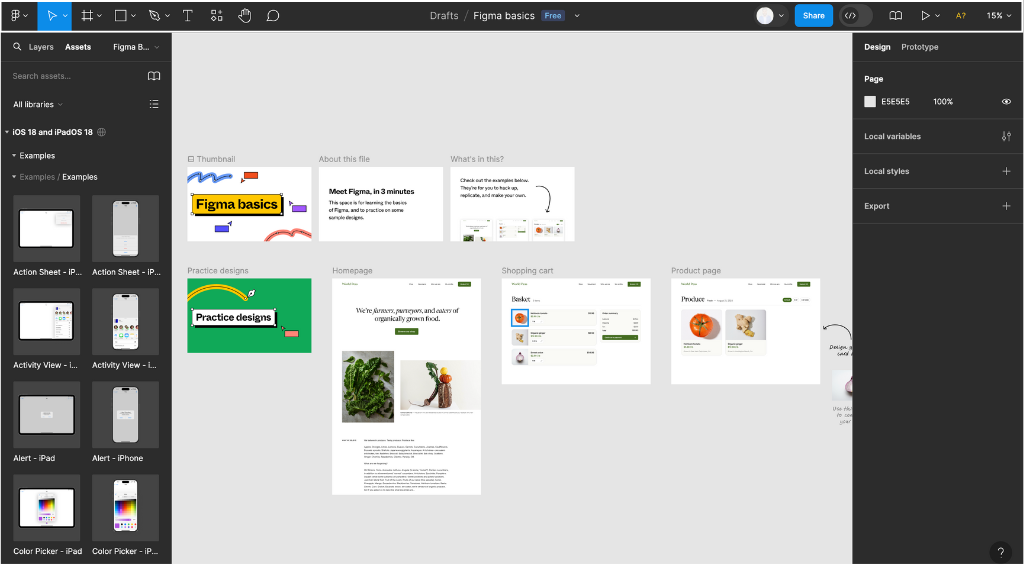
Once you're in, you'll see the Figma dashboard, your flow starting point for all your design adventures.
Navigating the Figma Interface
Now, let's take a quick tour of Figma.
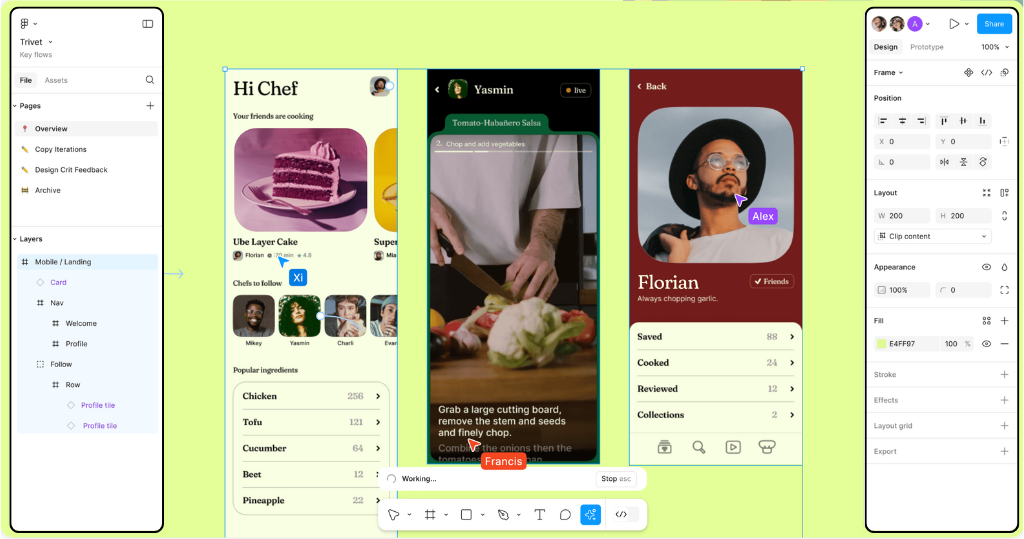
Think of it like a digital art studio. You have a big canvas where you'll create your designs, a toolbar with all your tools, and panels on the side to help you organize everything.
It might seem a bit overwhelming at first, but don't worry; you'll get the hang of it in no time!
The Canvas: This is your blank space where all the magic happens. It's like a giant sheet of paper where you'll draw, add text, and arrange all your design elements.
The Toolbar: This is where you'll find all the tools you need to create your designs. You'll use these tools to draw shapes, add text, and move things around.
The Layers Panel: Think of this as your design organizer. It keeps track of all the different elements in your design, like layers in a cake. You can use it to select, hide, or rearrange elements.
The Properties Panel: This is where you can customize your design elements. You can change their color, size, position, and a whole lot more.
Frames: Frames are like containers for your design elements. You can use them to group things and keep your designs organized. To start a new design, you'll create a starting frame using the frame tool in the toolbar.
The Prototype Tab: This is where you'll bring your designs to life! You can link different frames together to create interactive prototypes that show how your designs will work.
That's it for the basics! Now that you know your way around Figma, let's move on to the fun part - creating your first design!
Try Figma NOW!Essential Figma Tools and Features
Alright, now that you've got your Figma account and you're familiar with the interface, let's explore some of the essential tools and features that will help you create awesome designs.
Shape Tools
Think of these as your digital drawing tools. You've got rectangles, circles, lines, arrows, and even a fancy pen tool for drawing custom shapes.
Just select the tool you want from the toolbar, click & drag on the canvas, and voila!
You've created a shape. You can change its color and size and even rotate it using the properties panel.
Text Tool
Want to add some words to your design? The text tool is your best friend.
Just click on the canvas, start typing, and you'll see your text appear.
You can easily change the color, font, size, & alignment using (you guessed it!) the properties panel.
Vector Networks
This one might sound a bit technical, but it's actually pretty cool.
Vector networks let you create complex shapes that are easy to edit & resize without losing quality.
It's like magic! You can combine basic shapes, use the pen tool to draw custom paths, and even edit individual points on a shape.
Components and Instances
Imagine you're designing a website with multiple buttons.
Instead of creating each button from scratch, you can create one button as a "component" and then reuse it as many times as you want. These reuses are called "instances."
If you make a change to the original component, all the instances will update automatically. It's a huge time-saver!
Try Figma NOW!Constraints and Auto Layout
These features are like little helpers that keep your designs looking good, even when you resize them. Constraints tell Figma how elements should behave when their parent frame changes size.
Auto layout takes it a step further by automatically arranging elements within a frame, so you don't have to reposition everything manually.
Remember, the layers panel is your best friend when it comes to organizing your design file.
It keeps track of all your elements, so you can easily select, hide, or rearrange them.
These are just a few of the essential tools and features in Figma.
As you explore and experiment, you'll discover even more ways to bring your design ideas to life. So don't be afraid to play around and have fun!
Collaboration & Prototyping in Figma
Figma isn't just about designing alone in your room. It's also a fantastic tool for teamwork and bringing your designs to life!
Real-time Collaboration
Imagine you & your friends are working on a school project together. With Figma, you can all work on the same Figma file at the same time, just like editing a document together on Google Docs.
You can see each other's cursors moving around, and any changes you make appear instantly for everyone else. No more emailing files back and forth or waiting for someone to finish their part!
Commenting and Feedback
Need to give your friends some feedback on their design? No problem! Figma lets you leave comments directly on the canvas, just like sticky notes.
You can even tag specific people to get their attention. It's a great way to collaborate and make sure everyone's on the same page.
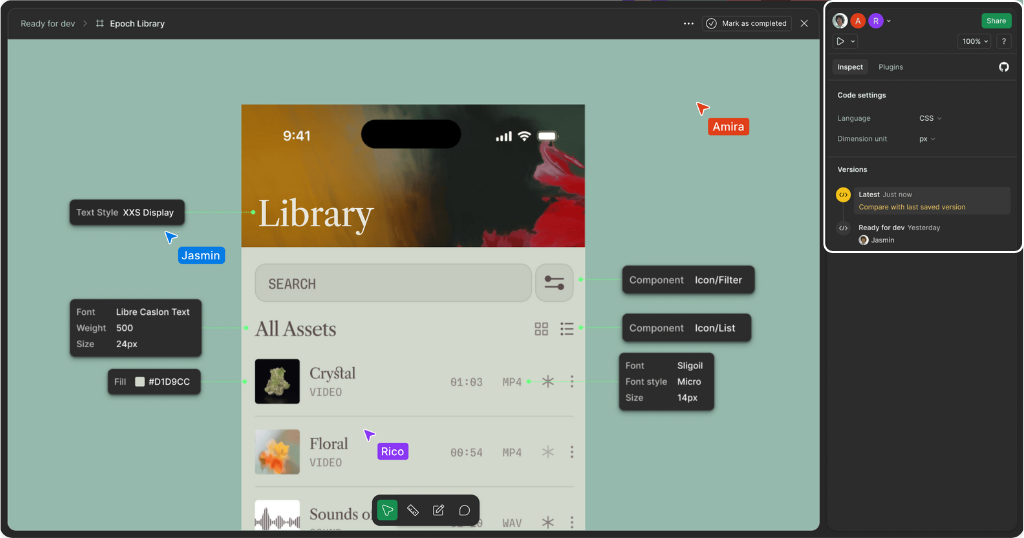
Prototyping
Ready to see your designs in action? Figma's prototyping feature lets you create interactive mockups that simulate how your final product will work.
You can link different frames together, add animations and transitions, and even test your prototype on your phone. It's like having a sneak peek into the future!
To create a prototype, start by selecting the first frame you want to link. Then, in the properties panel on the right, click the plus sign next to "Prototype."
You'll see a little blue circle appear on your frame. Click and drag this circle to another frame to create a connection. Now, when you click on the first frame in prototype mode, it will transition to the second frame.
You can also add interactions to your prototype, like hover effects or button clicks. Just select the element you want to interact with, and then choose the interaction type from the properties panel.
It's like building a mini-app right inside Figma!
Try Figma NOW!
Sharing Your Designs
Once you're happy with your designs, you can easily share them with others. Simply click the "Share" button in the top left corner of the Figma interface, and then choose how you want to share your file.
You can easily invite specific people to view or edit your file, or you can create a public link that anyone can access.
So there you have it! Figma makes it easy to collaborate with others and bring your designs to life. Whether you're working on a school project, a personal project, or even a professional project, Figma's got you covered.
Advanced Figma Techniques
Alright, now that you've mastered the basics, let's explore some advanced Figma techniques that will take your designs to the next level.
Plugins and Integrations
Think of plugins as little add-ons that give Figma superpowers.
They can help you do all sorts of cool things, like generate realistic data for your designs, create animations, or even export your designs directly to code.
There are tons of free and paid plugins available in the Figma Community, so be sure to explore and find ones that suit your needs.
Design Systems
Imagine you're designing an app design with multiple screens. You want all the buttons to look the same, all the headings to have the same font, and all the colors to match.
That's where design systems come in. They're like a style guide for your designs, keeping everything consistent and organized.
You can create color palettes, text styles, and even reusable components that you can easily access throughout your project.
Responsive Design
Have you ever noticed how websites look different on your phone compared to your laptop? That's because they're designed to be responsive, meaning they adapt to various screen sizes.
In Figma, you can use constraints and auto layout to create responsive designs that look great on any device.
Try Figma NOW!

Other Cool Tricks
Masking: This lets you hide parts of an image or shape, revealing only the areas you want to show. It's like using a stencil!
Boolean Operations: You can combine shapes in different ways, like adding, subtracting, or intersecting them. It's like playing with digital building blocks.
Blend Modes: These control how colors interact with each other, creating interesting effects like shadows, glows, and overlays.
Smart Selection: Figma can automatically select similar elements, making it easy to edit multiple objects at once.
Remember, practice makes perfect! The more you use Figma, the more comfortable you'll become with these advanced techniques. So don't be afraid to experiment and try new things.
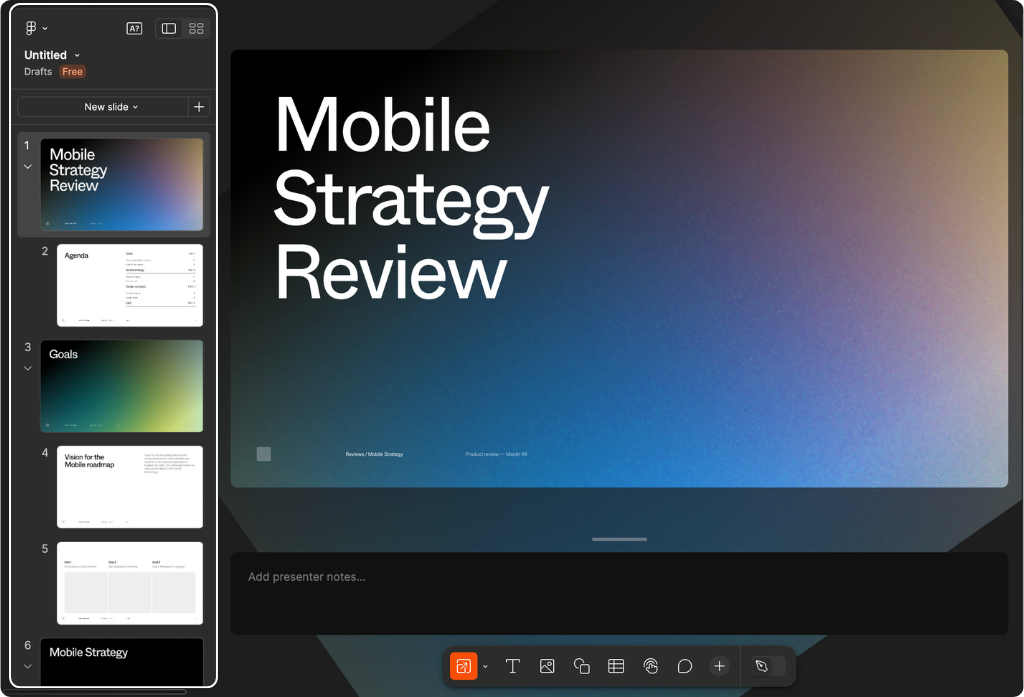
Pro Tip: When starting a new project, it's always a good idea to create a separate page for each screen or section of your design. This will help you keep things organized and make it easier to navigate your file.
Also, remember to name your layers and frames clearly so you know what everything is. You can even add descriptions to your layers to provide more context.
If you ever need to edit a specific element within a group, you can double-click on it to isolate it and make changes without affecting the rest of the group.
Finally, don't forget about the power of the text layer. You can use it to add labels and instructions or even create interactive elements like tooltips.
Just be sure to keep your text clear and concise, and use a font that's easy to read.
With these advanced techniques and tips, you'll be well on your way to becoming a Figma pro in no time!
Bringing Your Figma Design to Life with Buzzy
Okay, so you've got this amazing design in Figma, all shiny and pretty. But how do you turn it into an actual, working app?
That's where Buzzy comes in, like a superhero swooping in to save the day!

Figma + Buzzy = BFFs: Buzzy loves Figma! It can take your design and understand it like a best friend. All those buttons, images, and layouts? Buzzy sees them and knows exactly how to make them work in an app.
From Picture to App: It's like magic! Buzzy takes your Figma design and turns it into a real, live app. No complicated coding needed. You focus on the design, Buzzy handles the techy stuff.
AI Power-Up: Want to add some AI smarts to your app? Buzzy's got you covered. You can sprinkle in AI features right there in your Figma design. Imagine your app understanding what users say or recommending things they might like – all without writing a single line of code!
Test Drive Your App: With Buzzy, you can quickly create a test version of your app. This lets you see how it works and make changes before you show it to the world.
Launch Time! Once you're happy with your app, Buzzy makes it super easy to launch it on the web or even as a mobile app. It's like sending your creation out into the world to shine!
So, if you've got a Figma design and a dream, Buzzy can help you turn it into reality.
It's like having a tech-savvy sidekick who helps you build amazing AI apps without breaking a sweat. How cool is that?
Try Figma NOW!
Tips and Tricks
Okay, you're well on your way to becoming a Figma whiz! But let's kick things up a notch and learn some time-saving tips and tricks that will make you a design speedster.
Keyboard Shortcuts:
Think of keyboard shortcuts as secret codes that unlock Figma's hidden powers. They let you perform common actions with just a few keystrokes, saving you tons of time.
For example, instead of clicking through menus to copy and paste an element, you can press Ctrl+C and Ctrl+V.
Figma has a whole bunch of keyboard shortcuts, so be sure to check them out and memorize your favorites.
Templates and UI Kits:
Why reinvent the wheel when you can simply start with a pre-built foundation? Templates and UI kits are like pre-made design blueprints that you can easily customize to fit your needs.
They can save you hours of work, especially if you're designing something common, like a website or an app.
Figma's CommunCommunity is a treasure trove of free and paid templates and UI kits, so be sure to explore and find ones that spark your creativity.
Organization and Naming Conventions:
Imagine your Figma file is like a messy bedroom. It's hard to find anything, and it takes forever to clean up. That's why it's important to keep your Figma files organized from the start.
Use clear and descriptive names for your layers, frames, and components. Group similar elements together, and use colors or emojis to distinguish different sections visually.
A little bit of organization goes a long way in saving time and frustration down the road.
Try Figma NOW!
Other Time-Saving Tips
Master the Pen Tool: The pen tool might seem intimidating at first, but it's a powerful tool for creating custom shapes and illustrations. Once you get the hang of it, you'll be able to design anything you can imagine.
Embrace Figma's Community: Figma has a vibrant and supportive community of designers who are always sharing tips, tricks, and resources. Join online forums, follow Figma experts on social media, and don't be afraid to ask questions.
Practice, Practice, Practice: The more you use Figma, the faster and more efficient you'll become. So, set aside some time each day to experiment, try new things, and challenge yourself.
Remember, design is like a journey, not a destination. There's always something new to learn and discover. So keep exploring, keep creating, and most importantly, have fun!
Learning Resources for Figma
Alright, you've come a long way on your Figma journey! But remember, learning never stops. There are tons of amazing resources out there to help you keep growing and expanding your Figma skills.
Figma's Official Resources:
Figma wants you to succeed, so they've created a bunch of helpful resources right on their can check out their Help Center for answers to common questions, explore their tutorials for step-by-step guides, and even sign up for their webinars to learn from the experts.
And don't forget their YouTube channel, where you can find tons of video tutorials on everything Figma.
Online Courses and Communities:
If you're looking for a more structured learning experience, there are plenty of online courses available on platforms like Udemy, Skillshare, and Coursera. These courses range from beginner to advanced, so you can find one that fits your skill level.
And don't underestimate the power of community. There are tons of Figma communities on social media & forums where you can connect with other designers, ask questions, & share your work.
It's a great way to learn from others, get inspired, and stay motivated.
Try Figma NOW!
Other Learning Resources
Books and eBooks: There are several books and eBooks dedicated to Figma, offering in-depth tutorials and insights.
Blogs and Articles: Many design blogs and websites publish articles and tutorials about Figma. Keep an eye out for these resources to stay up-to-date on the latest tips and tricks.
Podcasts: Some podcasts focus on design and often feature interviews with Figma experts and discussions about the latest Figma trends.
Remember, the best way to learn is by doing. So don't be afraid to experiment, try new things, and challenge yourself. The more you practice, the more confident you'll become with Figma. And who knows, maybe one day you'll be the one sharing your Figma expertise with others!
Try Figma NOW!
Conclusion
So there you have it! We've journeyed through the exciting world of Figma, from setting up the account to exploring advanced techniques.
Remember, Figma is like a superpower for designers – it lets you create amazing things, collaborate with others, and bring your ideas to life.
Don't be afraid to experiment and make mistakes. That's how you learn and grow. Keep practicing, keep exploring, and most importantly, have fun!
The more you use Figma, the more confident you'll become. And before you know it, you'll be d
esigning like a pro.
So what are you waiting for? Go out there and start creating! The world is your canvas, and Figma is your brush. Happy designing!
Frequently Asked Questions
Is Figma free to use?
Yes, Figma offers a free plan that's perfect for beginners and small teams. It includes basic features and limited storage. If you need more advanced features or collaboration options, you can easily upgrade to a paid plan.
Can I use Figma on my phone or tablet?
Absolutely! Figma has a mobile app for both iOS & Android devices, allowing you to access your designs and prototypes on the go. You can even make basic edits and leave comments on your mobile device.
Do I need any design experience to use Figma?
Not at all! Figma is designed to be user-friendly, even for those with no prior design experience. The intuitive interface & helpful tutorials make it easy to learn the basics & start creating.
Can I import my designs from other software into Figma?
Yes, you can import files from popular design tools like Sketch, Adobe XD, and Illustrator into Figma. This allows you to transition your existing projects to Figma's collaborative environment seamlessly.
How can I easily stay updated on the latest Figma features and updates?
Figma regularly releases new features and updates. You can stay informed by following their blog, subscribing to the newsletter, or simply joining the online community.